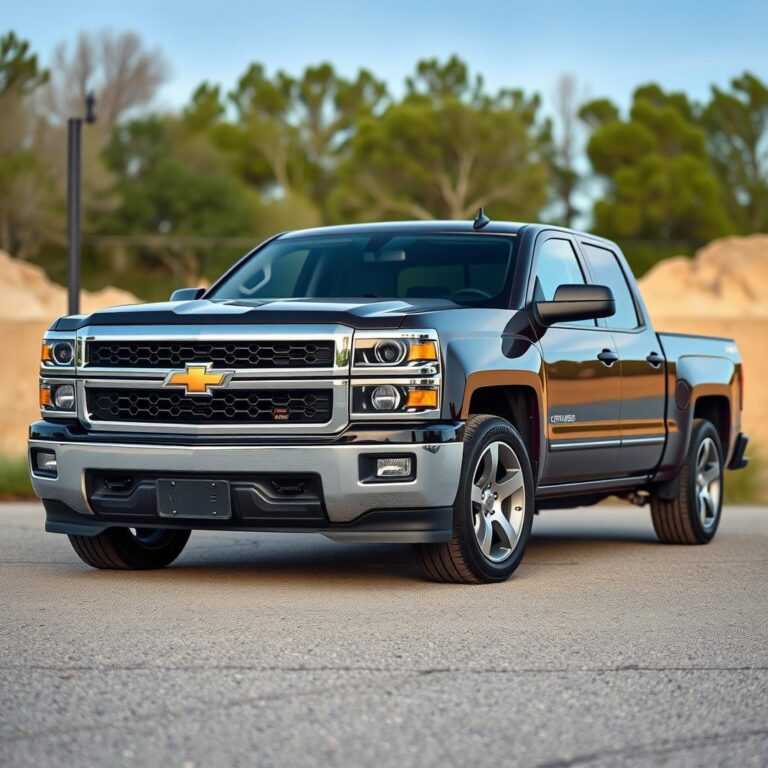
How To Mount A Trailer Hitch Receiver 2013 Chevy Silverado?
So, you’re thinking about adding a trailer hitch receiver to your 2013 Chevy Silverado? Good call. Maybe you want to haul some gear, tow a trailer, or just expand your truck’s capabilities. Let’s break down how to mount a trailer hitch receiver on your 2013 Chevy Silverado without the headaches.
Why Install a Trailer Hitch Receiver on Your 2013 Chevy Silverado?
Let’s face it, a pickup like your 2013 Chevy Silverado is built for work. Adding a trailer hitch receiver takes that utility to the next level. Think of the possibilities:
- Towing: Obvious, right? Boats, campers, utility trailers – you name it, you can tow it with the right hitch.
- Cargo Carriers: Need extra space for a road trip? A cargo carrier mounted on a hitch is way easier than cramming everything into the cab.
- Bike Racks: Ditch the roof rack and get a hitch-mounted bike rack. Your bikes will thank you (and so will your gas mileage).
- Increased Resale Value: A truck with a trailer hitch is often more attractive to potential buyers.
Before we dive into the how-to, it’s critical to understand the towing capacity of your 2013 Chevy Silverado. Check your owner’s manual or the sticker on your driver’s side door jamb to find the gross vehicle weight rating (GVWR) and maximum towing capacity. Don’t exceed these limits, or you’re asking for trouble, and you also want to be sure to buy the right hitch that will support what you are trying to tow.
Choosing the Right Trailer Hitch Receiver for Your 2013 Silverado
Not all trailer hitches are created equal. You’ll need to pick one that’s compatible with your 2013 Chevy Silverado and can handle the weight you plan to tow.
Hitch Classes: A Quick Overview
Trailer hitches are categorized by class, which indicates their weight capacity and receiver size. Here’s a simplified breakdown:
- Class 3 Hitches: These are the most common for trucks like the Silverado. They typically have a 2-inch receiver and can handle a decent amount of weight (usually up to 8,000 pounds gross trailer weight).
- Class 4 Hitches: These are heavier-duty hitches with a 2-inch or 2 1/2-inch receiver. They’re designed for towing heavier loads (up to 10,000 pounds or more).
- Class 5 Hitches: The big boys. These are for serious towing, with weight capacities exceeding 10,000 pounds.
For most Silverado owners, a Class 3 trailer hitch receiver is going to be the sweet spot, but always confirm the specifications to match your exact needs. Consider a weight distribution hitch if you are towing anything heavier.
Factors to Consider When Choosing a Hitch:
- Towing Needs: What’s the heaviest thing you plan to tow? This is the most important factor.
- Receiver Size: Most accessories (bike racks, cargo carriers) are designed for a 2-inch receiver.
- Installation: Some hitches are easier to install than others. Do you want to bolt it on yourself, or are you going to pay a shop to do it?
- Brand Reputation: Stick with reputable brands like Curt, Draw-Tite, or Reese. They’re known for quality and durability.
Tools You’ll Need to Mount a Trailer Hitch Receiver
Before you start wrenching, make sure you have all the necessary tools. Here’s a basic list:
- Socket Set: You’ll need a variety of socket sizes to tighten the hitch bolts.
- Wrench Set: A good set of wrenches is essential for holding nuts in place while you tighten bolts.
- Torque Wrench: This is crucial for tightening the bolts to the manufacturer’s specified torque. Don’t skip this step!
- Safety Glasses: Protect your eyes from flying debris.
- Gloves: Keep your hands clean and protected.
- Jack and Jack Stands: You might need to lift the truck slightly for easier access. Never work under a vehicle supported only by a jack. Use jack stands!
- Penetrating Oil: If your truck is older, the bolts might be rusty. Penetrating oil can help loosen them.
- Wire Brush: To clean any rust or debris from the mounting points on your truck’s frame.
- Helper (Optional): It’s always easier to have a friend help you hold the hitch in place while you bolt it on.
Step-by-Step Guide: Mounting a Trailer Hitch Receiver on a 2013 Chevy Silverado
Alright, let’s get down to business. This is a general guide, but always refer to the specific instructions that come with your trailer hitch receiver.
- Preparation: Park your Silverado on a level surface, engage the parking brake, and chock the wheels.
- Clean the Mounting Points: Use a wire brush to remove any rust, dirt, or debris from the mounting points on your truck’s frame.
- Test Fit: Before you start bolting anything, hold the trailer hitch receiver up to the frame and make sure the bolt holes line up.
- Install the Hitch:
- Lift the hitch into position (this is where a helper comes in handy).
- Insert the bolts through the hitch and into the frame.
- Snug the bolts up with a wrench and socket, but don’t tighten them fully yet.
- Torque the Bolts: This is the most critical step. Use a torque wrench to tighten the bolts to the manufacturer’s specified torque. Do not overtighten! This can damage the bolts or the frame.
- Double-Check: Once you’ve torqued all the bolts, double-check to make sure everything is secure.
- Wiring (If Applicable): If you’re also installing trailer wiring, follow the instructions that come with the wiring kit.
That’s how to mount a trailer hitch receiver on your 2013 Chevy Silverado. Now you have the means to accomplish so much more.
 “`html
So, you’re thinking about adding a trailer hitch receiver to your 2013 Chevy Silverado?
Good call.
Maybe you want to haul some gear, tow a trailer, or just expand your truck’s capabilities.
Let’s break down how to mount a trailer hitch receiver on your 2013 Chevy Silverado without the headaches.
Why Install a Trailer Hitch Receiver on Your 2013 Chevy Silverado?
Let’s face it, a pickup like your 2013 Chevy Silverado is built for work.
Adding a trailer hitch receiver takes that utility to the next level.
Think of the possibilities:
- Towing: Obvious, right? Boats, campers, utility trailers – you name it, you can tow it with the right hitch.
- Cargo Carriers: Need extra space for a road trip?
A cargo carrier mounted on a hitch is way easier than cramming everything into the cab. - Bike Racks: Ditch the roof rack and get a hitch-mounted bike rack.
Your bikes will thank you (and so will your gas mileage). - Increased Resale Value: A truck with a trailer hitch is often more attractive to potential buyers.
Before we dive into the how-to, it’s critical to understand the towing capacity of your 2013 Chevy Silverado.
Check your owner’s manual or the sticker on your driver’s side door jamb to find the gross vehicle weight rating (GVWR) and maximum towing capacity.
Don’t exceed these limits, or you’re asking for trouble, and you also want to be sure to buy the right hitch that will support what you are trying to tow.
Choosing the Right Trailer Hitch Receiver for Your 2013 Silverado
Not all trailer hitches are created equal.
You’ll need to pick one that’s compatible with your 2013 Chevy Silverado and can handle the weight you plan to tow.
Hitch Classes: A Quick Overview
Trailer hitches are categorized by class, which indicates their weight capacity and receiver size.
Here’s a simplified breakdown:
- Class 3 Hitches: These are the most common for trucks like the Silverado.
They typically have a 2-inch receiver and can handle a decent amount of weight (usually up to 8,000 pounds gross trailer weight). - Class 4 Hitches: These are heavier-duty hitches with a 2-inch or 2 1/2-inch receiver.
They’re designed for towing heavier loads (up to 10,000 pounds or more). - Class 5 Hitches: The big boys.
These are for serious towing, with weight capacities exceeding 10,000 pounds.
For most Silverado owners, a Class 3 trailer hitch receiver is going to be the sweet spot, but always confirm the specifications to match your exact needs.
Consider a weight distribution hitch if you are towing anything heavier.
Factors to Consider When Choosing a Hitch:
- Towing Needs: What’s the heaviest thing you plan to tow?
This is the most important factor. - Receiver Size: Most accessories (bike racks, cargo carriers) are designed for a 2-inch receiver.
- Installation: Some hitches are easier to install than others.
Do you want to bolt it on yourself, or are you going to pay a shop to do it? - Brand Reputation: Stick with reputable brands like Curt, Draw-Tite, or Reese.
They’re known for quality and durability.
Tools You’ll Need to Mount a Trailer Hitch Receiver
Before you start wrenching, make sure you have all the necessary tools.
Here’s a basic list:
- Socket Set: You’ll need a variety of socket sizes to tighten the hitch bolts.
- Wrench Set: A good set of wrenches is essential for holding nuts in place while you tighten bolts.
- Torque Wrench: This is crucial for tightening the bolts to the manufacturer’s specified torque.
Don’t skip this step! - Safety Glasses: Protect your eyes from flying debris.
- Gloves: Keep your hands clean and protected.
- Jack and Jack Stands: You might need to lift the truck slightly for easier access.
Never work under a vehicle supported only by a jack. Use jack stands! - Penetrating Oil: If your truck is older, the bolts might be rusty.
Penetrating oil can help loosen them. - Wire Brush: To clean any rust or debris from the mounting points on your truck’s frame.
- Helper (Optional): It’s always easier to have a friend help you hold the hitch in place while you bolt it on.
Step-by-Step Guide: Mounting a Trailer Hitch Receiver on a 2013 Chevy Silverado
Alright, let’s get down to business.
This is a general guide, but always refer to the specific instructions that come with your trailer hitch receiver.
- Preparation: Park your Silverado on a level surface, engage the parking brake, and chock the wheels.
- Clean the Mounting Points: Use a wire brush to remove any rust, dirt, or debris from the mounting points on your truck’s frame.
- Test Fit: Before you start bolting anything, hold the trailer hitch receiver up to the frame and make sure the bolt holes line up.
- Install the Hitch:
- Lift the hitch into position (this is where a helper comes in handy).
- Insert the bolts through the hitch and into the frame.
- Snug the bolts up with a wrench and socket, but don’t tighten them fully yet.
- Torque the Bolts: This is the most critical step.
Use a torque wrench to tighten the bolts to the manufacturer’s specified torque.
Do not overtighten! This can damage the bolts or the frame. - Double-Check: Once you’ve torqued all the bolts, double-check to make sure everything is secure.
- Wiring (If Applicable): If you’re also installing trailer wiring, follow the instructions that come with the wiring kit.
That’s how to mount a trailer hitch receiver on your 2013 Chevy Silverado.
Now you have the means to accomplish so much more.
Troubleshooting Common Issues When Installing a Trailer Hitch
Okay, so you’re in the middle of mounting your trailer hitch receiver on your 2013 Chevy Silverado, and things aren’t going exactly as planned?
Don’t sweat it; it happens.
Let’s look at some common snags and how to fix them.
Rusty Bolts Are Your Enemy
If you’re dealing with an older Silverado, especially one that’s seen some winters, rusty bolts can be a real pain.
Here’s the play:
- Penetrating Oil is Your Friend: Soak those bolts in penetrating oil (like PB Blaster or Liquid Wrench) for at least 30 minutes, preferably longer.
Reapply a couple of times. - Heat It Up: If penetrating oil isn’t enough, carefully use a torch to heat the bolt.
The heat will help break down the rust.
But be super careful around fuel lines and other flammable stuff! - Breaker Bar Power: Sometimes, you just need more leverage.
A breaker bar can give you the extra oomph to break those bolts loose. - Impact Wrench: An impact wrench can be a lifesaver for stubborn bolts.
The concussive force can often break them free.
Bolt Holes Don’t Line Up?
Sometimes, the bolt holes on the hitch receiver don’t perfectly align with the holes on your Silverado’s frame.
This can be frustrating, but here’s what to do:
- Loosen Everything: Make sure all the bolts are loose but not fully tightened.
This gives you some wiggle room. - Use a Punch or Awl: Insert a punch or awl into one of the bolt holes to help align the hitch.
- A Little Muscle: Sometimes, you need to use a little bit of force to get everything lined up.
A pry bar can be helpful here, but be careful not to damage anything. - Check the Hitch: Double-check that you have the correct hitch for your 2013 Chevy Silverado model.
Mistakes happen!
Stripped Bolt Threads
Stripped bolt threads are a nightmare, but they can be fixed.
Here’s the drill:
- Thread Repair Kit: A thread repair kit (like a Heli-Coil kit) can allow you to repair the damaged threads.
Follow the instructions carefully. - Tap and Die Set: If the threads are only slightly damaged, you might be able to clean them up with a tap and die set.
- Go Bigger: As a last resort, you can drill out the hole and use a larger bolt.
But this requires careful drilling and tapping.
Safety First: Key Considerations When Mounting Your Hitch
Mounting a trailer hitch receiver on your 2013 Chevy Silverado isn’t rocket science, but safety should always be your top priority.
Here’s what to keep in mind:
- Wear Safety Glasses: Protect your eyes from flying debris.
Metal shards and rust can cause serious eye injuries. - Use Gloves: Keep your hands clean and protected from sharp edges.
- Never Work Under a Vehicle Supported Only by a Jack: Use jack stands to support the truck’s weight.
Jacks can fail, and you don’t want to be under a falling vehicle. - Torque to Spec: Always use a torque wrench to tighten the bolts to the manufacturer’s specified torque.
Overtightening can damage the bolts or the frame, while undertightening can lead to the hitch coming loose. - Double-Check Everything: Before you hit the road, double-check that all the bolts are tight and that the hitch is securely mounted.
Maintaining Your Trailer Hitch Receiver
Once you’ve successfully mounted your trailer hitch receiver on your 2013 Chevy Silverado, you’ll want to keep it in good condition.
Here’s how:
- Regular Cleaning: Wash your hitch receiver regularly to remove dirt, salt, and grime.
This will help prevent rust. - Lubrication: Apply grease to the hitch ball and receiver tube to prevent wear and tear.
- Rust Prevention: If you live in an area with a lot of salt, consider applying a rust inhibitor to your hitch receiver.
- Inspect Regularly: Inspect your hitch receiver regularly for signs of rust, damage, or wear.
Replace it if necessary.
FAQ About Installing a Trailer Hitch Receiver on a 2013 Chevy Silverado
Got more questions about mounting a trailer hitch receiver on your 2013 Chevy Silverado?
Let’s tackle some frequently asked questions.
Can I install a trailer hitch myself?
Absolutely!
Mounting a trailer hitch receiver is a manageable DIY project for most people with basic tools and mechanical skills.
Just follow the instructions carefully and take your time.
But if you’re not comfortable working on your vehicle, it’s always best to have a professional install it.
How long does it take to install a trailer hitch?
For most people, it takes about 1-2 hours to install a trailer hitch receiver on a 2013 Chevy Silverado.
But it could take longer if you run into problems like rusty bolts.
How much does it cost to have a trailer hitch installed professionally?
The cost to have a trailer hitch installed professionally can vary depending on the shop and the type of hitch.
Generally, you can expect to pay between $100 and $300 for installation.
Call around to different shops to get quotes.
Do I need to install trailer wiring?
If you plan to tow a trailer with lights, you’ll need to install trailer wiring.
This will allow you to connect the trailer’s lights to your Silverado’s electrical system.
Trailer wiring kits are available at most auto parts stores.
So, you now know how to mount a trailer hitch receiver on your 2013 Chevy Silverado, transforming it into a towing machine.
“`